Articulate Rise 360 is the best option for developing eLearning content for your organization if you want to move from text-heavy courses. Articulate Rise develops eLearning courses using flexible components called learning blocks to create custom eLearning courses.
Table of Contents
- What is Articulate Rise?
- What can you create using Articulate Rise?
- Using Rise 360
- How can you create a new course in Rise 360?
- How can you personalize a course using Rise 360?
- What is a Real content course? How to Create a Course with Real Content?
- How to create a Rise Course with Templates?
- How to Create a New Blank Course?
- How to Outline a Course with Section Headers and Lesson Titles?
- How to Add Sections and Lessons?
- How to Delete Sections and Lessons?
- How to duplicate a lesson in Rise 360?
- How to Change Lesson Icons?
- How to choose lesson and block types?
- What are the lesson types in Rise 360?
- How to add text and media in Rise 360?
- How to personalize the theme?
- How to Control Navigation?
- Infographics
- Knowledge Check!
- Frequently Asked Questions (FAQs)
- What is Articulate Rise 360?
- When was Articulate Rise launched?
- What is Articulate Storyline and Rise?
- Is articulate rise cloud-based?
What is Articulate Rise?
Articulate Rise is a web application you can access through an Articulate 360 subscription. It will run smoothly on any device through your browser. You need not download any software.
It has been challenging to create responsive courses while using an authoring tool. Responsive course content fits the screen size on which it is viewed. Articulate Rise is primarily to create responsive courses. Therefore they look great on all devices.
What can you create using Articulate Rise?
- You can build online courses
- You can preview the content display for different device sizes
- You can export it to SCORM/xAPI and upload it to your LMS
Using Rise 360
Articulate Rise 360 is an easy-to-use web application. It is included in your Articulate 360 subscription. With Articulate Rise 360, you can create responsive eLearning courses. You needn’t download and install anything to use Articulate Rise. Log in to Articulate 360 and click Rise 360 to see your dashboard.
How can you create a new course in Rise 360?
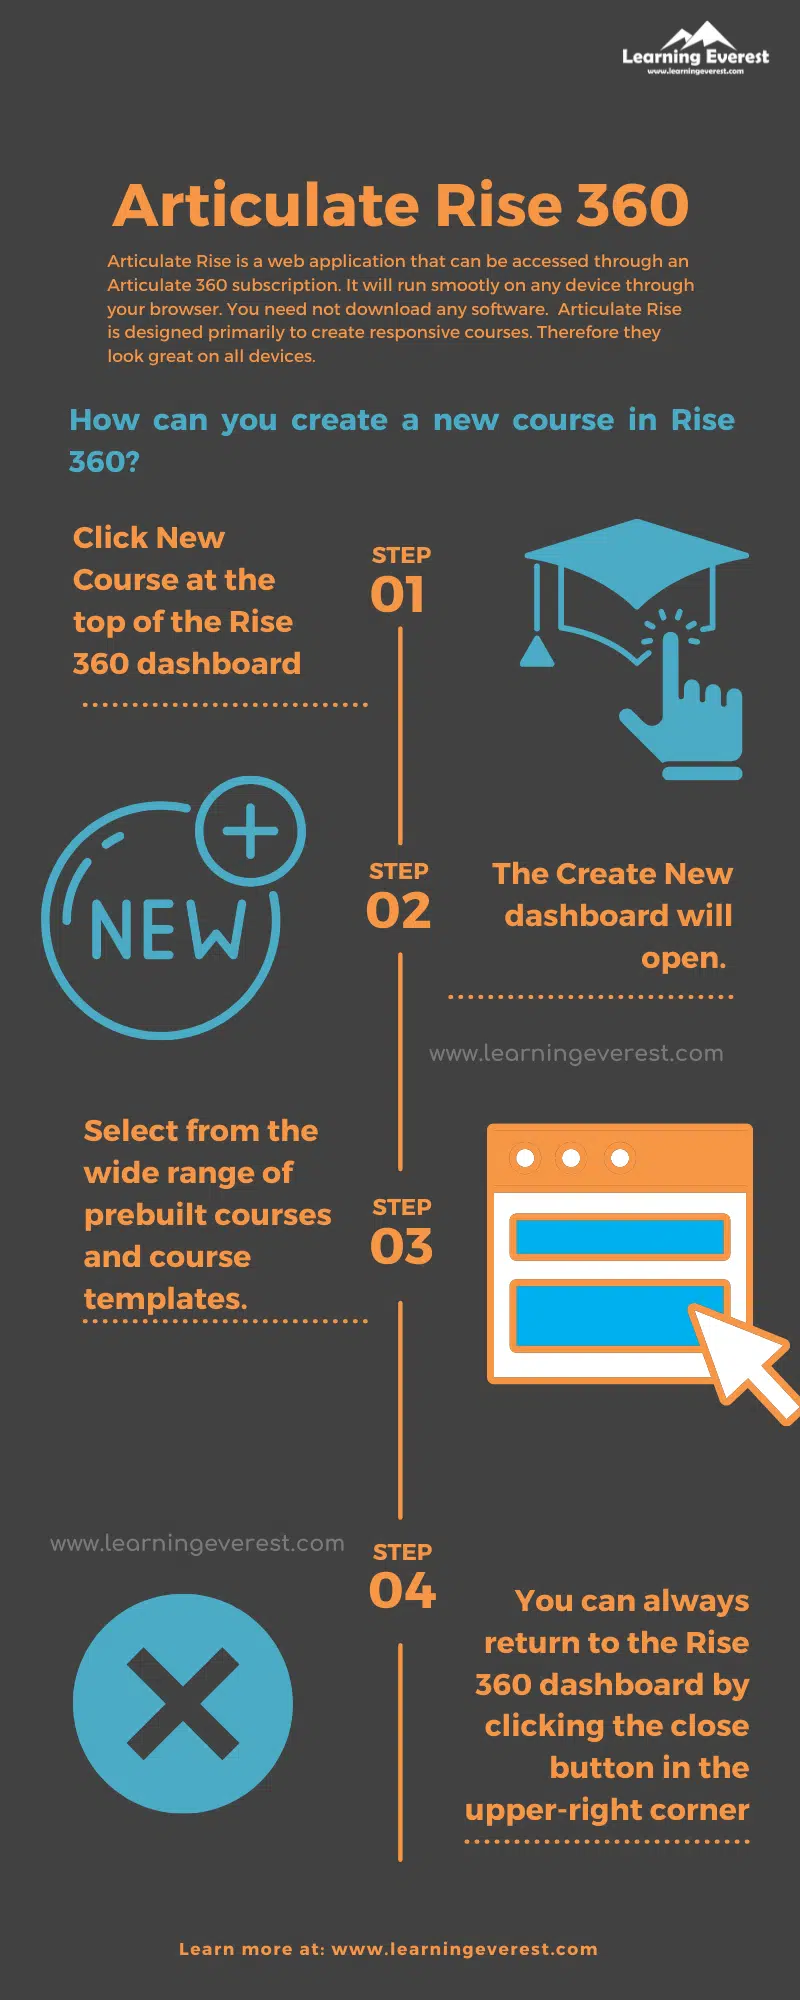
You have to take the following steps to create a new course in Rise 360:
- Click New Course at the top of the Rise 360 dashboard.
- The Create New dashboard will open.
- Select from the wide range of prebuilt courses and course templates.
- You can always return to the Rise 360 dashboard by clicking the close button in the upper-right corner.
How can you personalize a course using Rise 360?
- Browse Available Courses
You choose between actual content courses or course templates from the dashboard. There following are the ways to browse available course content:
- The featured is a curated list of content that the Articulate thinks you would love.
- Popular is a list of content used by other content creators frequently.
- Recently Added has the most recent content added to Rise.
- You can also jump to specific content by clicking an entry in the topic list on the left-hand side of the dashboard.
- Select or Preview the Course Content
You can click “Select This Course” to immediately add an editable copy to your Create dashboard. You can click the “Preview Course button” to preview the course.
- Personalize Your Course
You can edit real content courses and course templates and then share them.
What is a Real content course? How to Create a Course with Real Content?
Real content courses are ready-to-use training content on a variety of everyday topics. They are the fastest way for you to add content to your library. You can find them on the Create New dashboard.
The following are the different topics on which Articulate Rise has real content courses.
- Compliance
- Customer Success and Service
- Diversity and Inclusion
- Health and Wellness
- Human Resources
- Information Technology
- Leadership
- Personal Development
- Professional Skills
- Sales and Marketing
How to create a Rise Course with Templates?
You can build engaging and interactive lessons using customizable templates. To get started, click on the New Course button. From the Create New dashboard, filter the library to display templates. Click the link to learn more about creating courses using real content. Templates can help you get started.
How to Create a New Blank Course?
The following steps will allow you to create a new Rise 360 course:
- Click on the New Course button on your Rise 360 dashboard.
- Click the Blank Course button in the upper right of the dashboard.
- The empty course template will appear.
How to Outline a Course with Section Headers and Lesson Titles?
Before adding content to a Rise 360 course, you must outline the course with lesson titles and organize lessons into sections. Remember, a course must have one lesson at least, but there is no limit to the number of lessons. The outline with section headers and lesson titles appears on the cover page and sidebar.
How to Add Sections and Lessons?
Add a section header:
Type the section header or lesson title in the Add a lesson title placeholder.
- If you want to make it a section header, press Shift+Enter
- If you want to make it a lesson title, press Enter
Inserting a new section or lesson between:
- Click on the divider where you want to add a new section or lesson.
- A placeholder will be inserted.
- Type the section header or lesson title.
Rearranging Sections and Lessons
- Drag them up or down the list.
- Drop the section or lesson where you want to place them.
How to rename Sections and Lessons?
- Click on the title and type the new title.
- The changes will be saved immediately.
How to Delete Sections and Lessons?
To delete a section header
- Hover over it.
- Click the delete icon.
To delete a lesson that has content:
- Hover over it
- Click the ellipsis that appears
- Choose Delete
If you have deleted a section header or lesson, an undo option will temporarily be there. It will be on the lower-left corner of the screen. Click Undo to restore it.
How to duplicate a lesson in Rise 360?
To duplicate a lesson:
- Hover over the lesson
- Click the ellipsis
- Choose duplicate.
The duplicated lesson will appear below the original lesson in your course outline.
How to Change Lesson Icons?
- Hover over the lesson
- Click the ellipsis
- Choose change icon
- Select an icon from the list
How to choose lesson and block types?
- Outline course with lesson titles
- Click Add Content for each lesson
- Choose whether it is to be a lesson, business content lesson, or quiz
What are the lesson types in Rise 360?
The following are the lesson and block types in Rise 360:
- Lessons
- Business Content
- Quizzes
- Lessons
How to add text and media in Rise 360?
In Rise 360, blocks are form-based templates. You can edit the lesson title. It also allows you to show or hide the author for every lesson. You can add text, images, narration, videos, and embedded web content.
To add text:
Type your text in the web interface. You can also copy text from external sources and paste it.
Add and edit text. Then, format text by choosing formatting options on the toolbar or keyboard shortcuts.
To insert tables and lists:
Quick insert allows you to add tables and lists to blocks easily.
- Click Quick Insert (+).
- Then, select Insert Table, Unordered List, or Ordered List from the options.
To add images:
- Click on the camera icon or the “Add Images button.”
- Upload images from your computer or assets in Content Library 360.
- Use high-quality images
- Click Edit to remove or replace it.
- You can also add alternate text for screen readers.
To add audio:
- Click the Record Audio microphone icon,
- Click Start Recording or Upload a file.
- Click Edit to remove or replace it.
To add videos:
- Click the camera icon.
- Choose Upload media.
- Use high-quality videos with a 16:9 aspect ratio for the best results.
- Click Edit to remove or replace it.
Web Content
- Click the camera icon.
- Choose Embed from the web.
- Paste the URL or embed code you want to use.
How to personalize the theme?
You can personalize a Rise 360 course by:
- Inserting a logo
- Adding a cover photo
- Choosing an accent color
- Changing fonts
How to Control Navigation?
If you don’t want learners to roam freely around a course, you can control how learners navigate through a course.
Learners can move freely throughout a course by default. Just change the navigation mode.
- Click Settings
- Select the Navigation tab.
- Choose Free or Restricted.
- Click Close.
Rise is entirely web-based, and all that is required is a web browser. Direct commenting on the created work makes review and feedback easy. The options Rise 360 has will help you create great-looking responsive eLearning content. It is a good choice for eLearning course development. Rise 360 can produce completely responsive courses. Therefore, Articulate Rise should be at the top of your list.
Infographics
Knowledge Check!
Frequently Asked Questions (FAQs)
What is Articulate Rise 360?
Articulate Rise 360 is an eLearning authoring tool that allows designers to create responsive courses for any device. Rise enables instructional designers to develop online courses easing using a web-based builder.
When was Articulate Rise launched?
January 25, 2019.
What is Articulate Storyline and Rise?
The storyline is a standard software package that requires download and installation on a developer’s computer. Rise is cloud-based, allowing a developer to gain access from any modern web browser.
Is articulate rise cloud-based?
When you work in Rise or collect feedback in Articulate Review, the information is stored remotely in the cloud. No files are saved to your machine unless you download an attachment in either of the apps. The work is kept safely in the cloud.


