In this blog, we will tell you how you can put a character or an image into a shape in Articulate Storyline 360.
Table of Contents
- Step-by-Step Guide: Building an Interactive Avatar Selector in Storyline 360
- Implementing character selection
- Knowledge Check!
- Frequently Asked Questions (FAQs)
- 1. What is an avatar selector in Articulate Storyline 360?
- 2. Why would I want to include an avatar selector in my e-learning course?
- 3. How do I create an avatar selector in Articulate Storyline 360?
Step-by-Step Guide: Building an Interactive Avatar Selector in Storyline 360
Adding a Character
Inserting a character
In Slide View, go to the Insert tab on the Storyline ribbon and select Characters (You can also import characters directly into the media library). When the character browser opens, choose a character, choose an expression, pose, and perspective, then click Insert.
Create an Avatar Selector in Articulate Storyline 360
Avatar Selector in Articulate Storyline 360
Editing a character
Characters behave like other images in Storyline. After adding them to your course, you can move, resize, crop, format, and animate them. Go to the format tab in the slide view, crop it with your perspective, click on picture shape, and select circle. If you want to add a border for the character, click the picture border below the picture shape and add a border; similarly, it is the same for the second character.
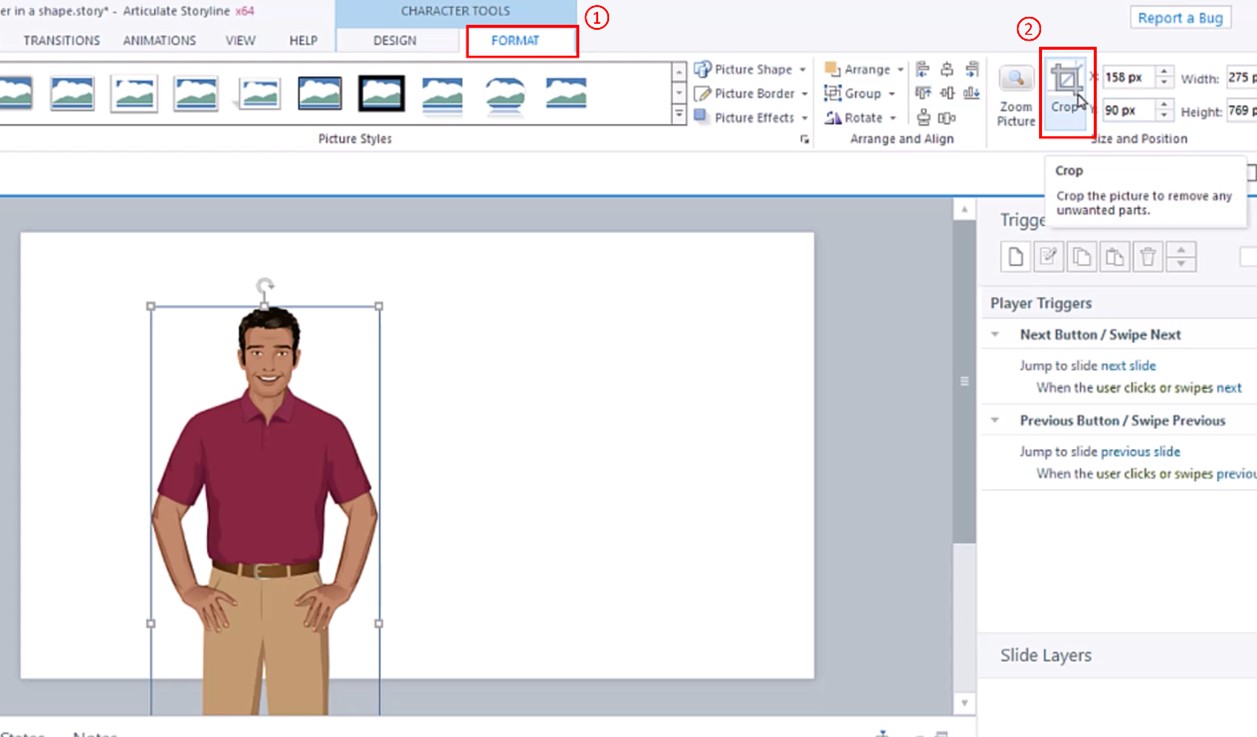
Editing a character
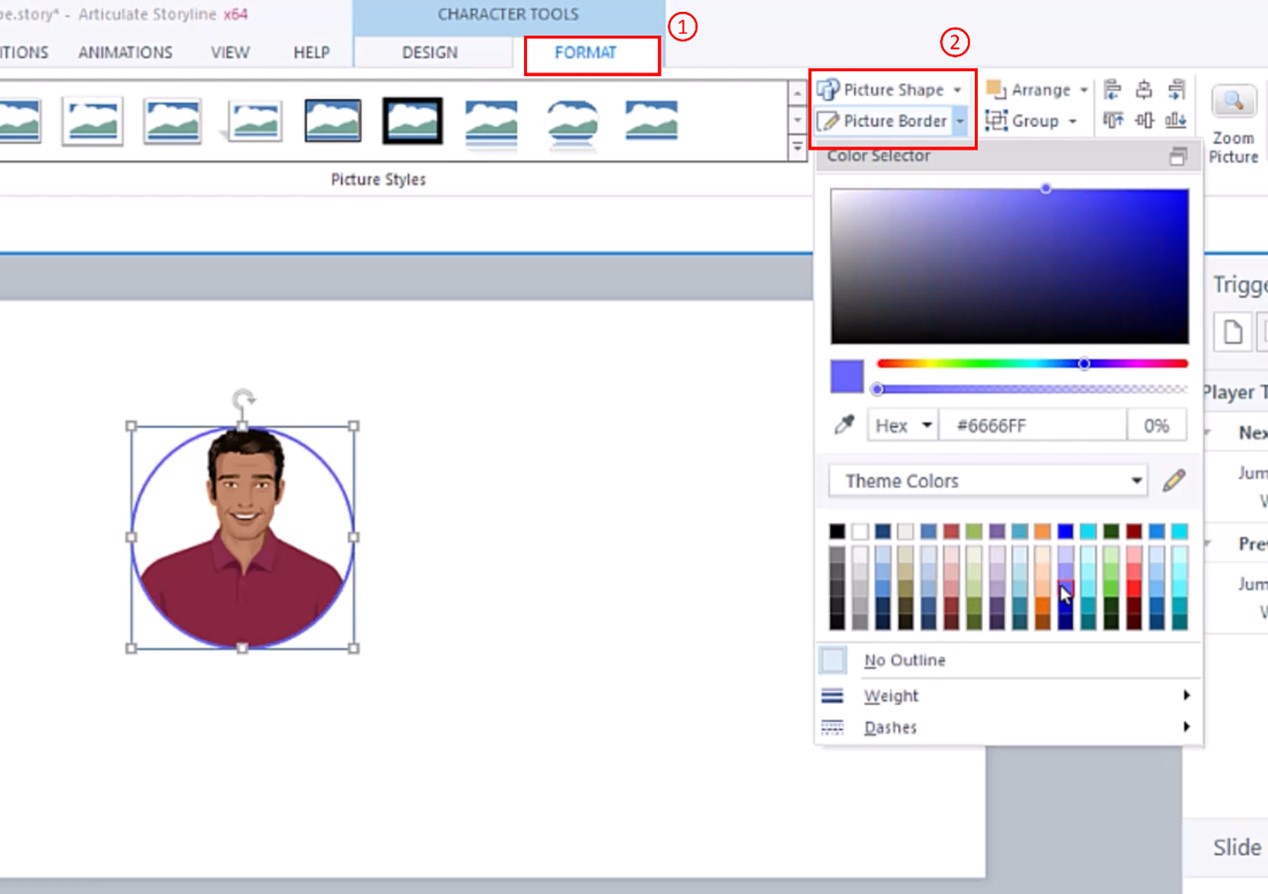
Editing a character in Articulate Storyline 360
Implementing character selection
Step 1: Create a button set
To make only one of the characters selectable,
- First, select both of the Characters.
- Then, right-click, and an option will be called Button Set.
- Choose button set one (You can create a new set if you’d like).
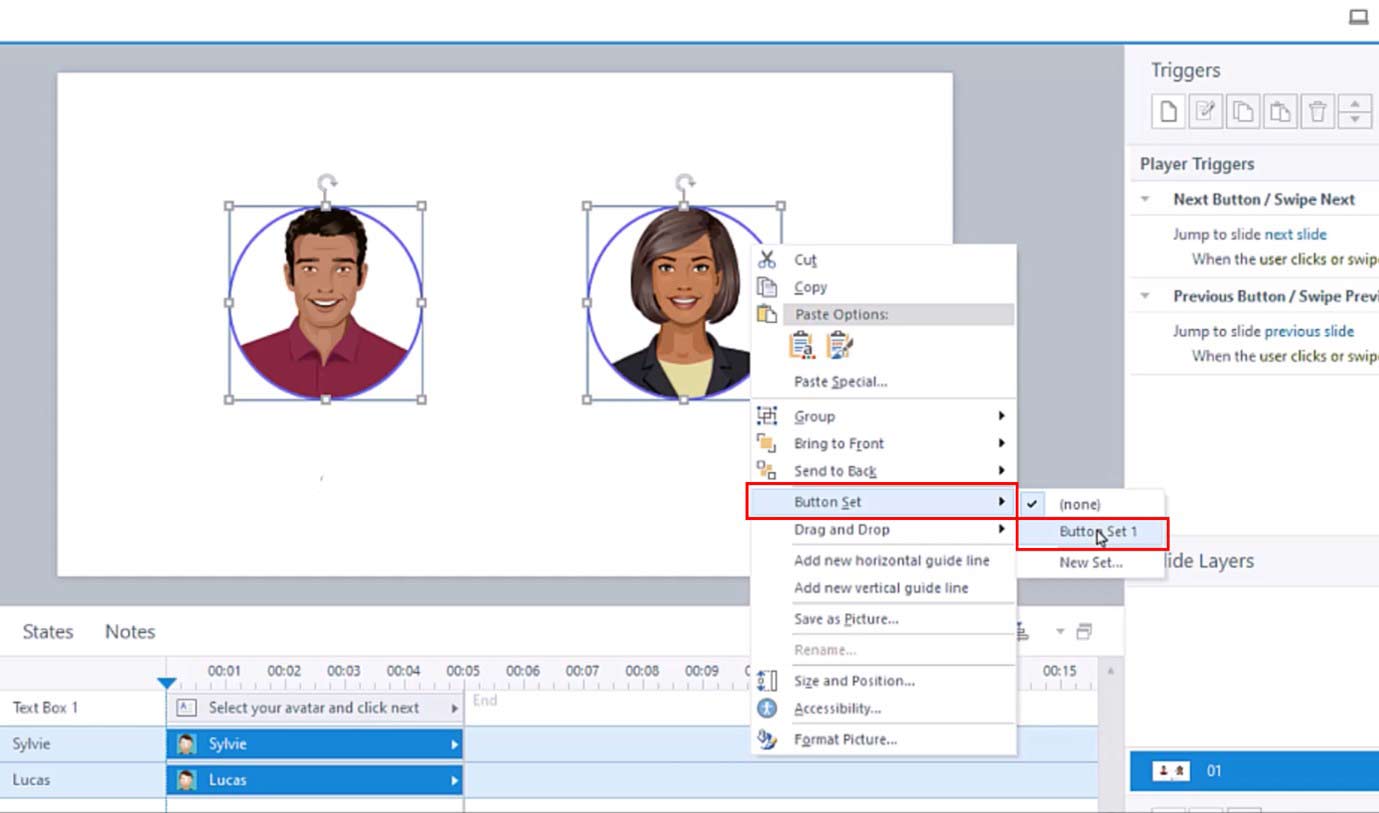
Step 1 – Create a button set
So, we’ve got a button set here, and now we need to add variables.
Step 2: Setting variables
- Add a little prompt saying, “Select your avatar and click next.”
- Then, set up some variables. So, go to your manage project variables
- Create a true/false variable for one character; the default is false. Then, the other character is true/false.
- Click okay.
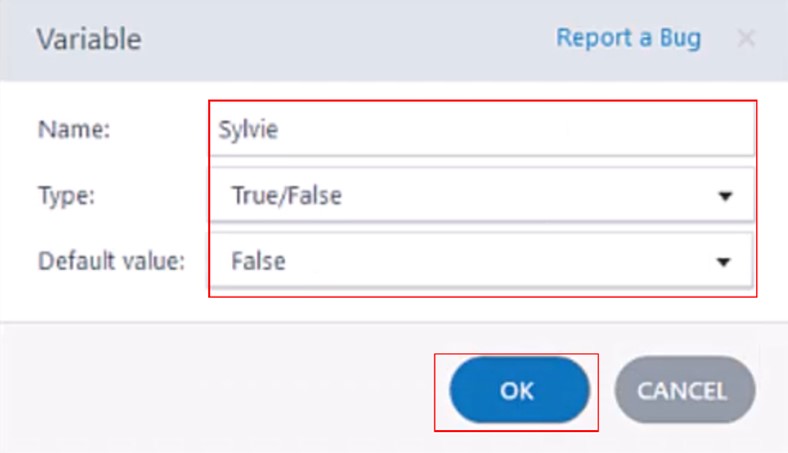
Step 2- Setting variables
That’s it!
Step 3: Adding triggers
- Add a trigger to adjust variable states to a value of true when a state Of the first character is selected
- Then copy and paste that for the other character as well
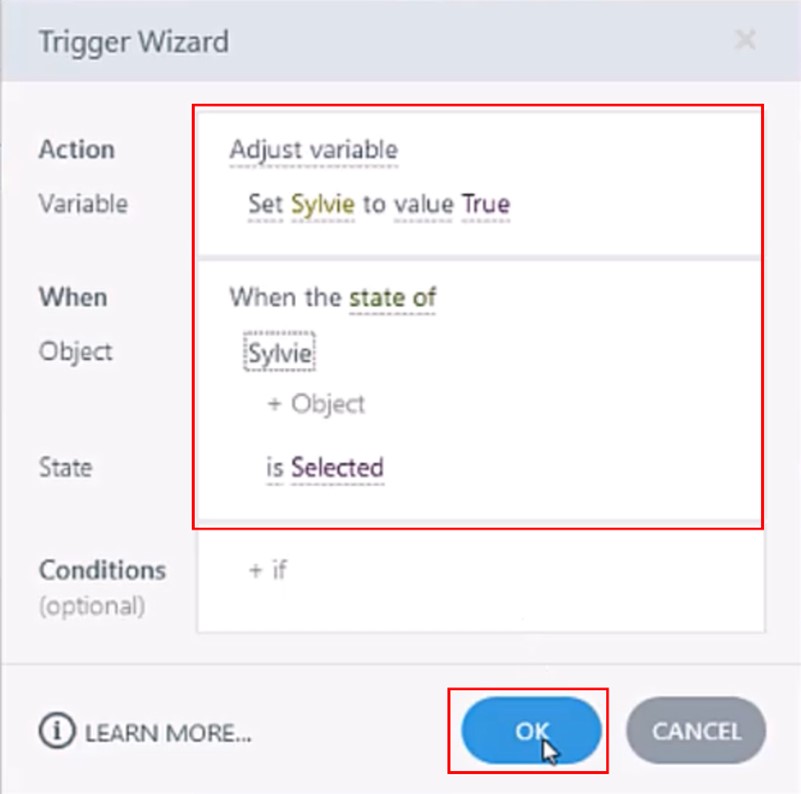
Step 3- Adding triggers
Step 4: Changing default states
Set the initial state of both characters to hidden. Add triggers to change the state of each character to normal when the timeline starts on the slide, depending on the corresponding variable state.
- Change the state of the first character to normal when the timeline starts on the slide if the variable is equal to true.
- Change the state of the other character to normal when the timeline starts on the slide if the variable is equal to true.
So now, when we Preview, what should happen is based on whoever you selected, that should be the avatar. Replay the scene to confirm the functionality—once a character is selected, it becomes the designated avatar throughout the course.
This method leverages variables, states, and triggers to consistently maintain the selected object’s state across the entire course.
Knowledge Check!
Now, you are familiar with How to create an Avatar Selector in Articulate Storyline 360. There is a lot more you can do on Storyline, and we will cover more of its functionalities in the following tutorials. Stay tuned!
Frequently Asked Questions (FAQs)
1. What is an avatar selector in Articulate Storyline 360?
An avatar selector is a feature used in Articulate Storyline 360 to allow users to choose from a selection of avatar images to personalize their learning experience.
2. Why would I want to include an avatar selector in my e-learning course?
Including an avatar selector adds visual appeal, personalization, and engagement to your course, which can enhance the overall learning experience for users.
3. How do I create an avatar selector in Articulate Storyline 360?
To create an avatar selector, you would typically import avatar images, set up buttons or interactive elements for users to select their preferred avatar, and utilize triggers and variables to track and display the selected avatar throughout the course.


