Articulate Storyline is a powerful e-learning authoring tool that allows you to create engaging and interactive courses. In this tutorial, we’ll walk you through the process of creating a custom quiz using Articulate Storyline.
Here Are 8 Steps for Creating a Custom Quiz in Articulate Storyline 360
Follow along with the steps outlined below to build your own interactive quiz.
Step 1: Accessing the quiz
Begin by opening your Articulate Storyline project. Once you are in the default view, navigate to the “Slides” tab located in the top ribbon. From the quizzing section, choose the “Freeform Question” option.
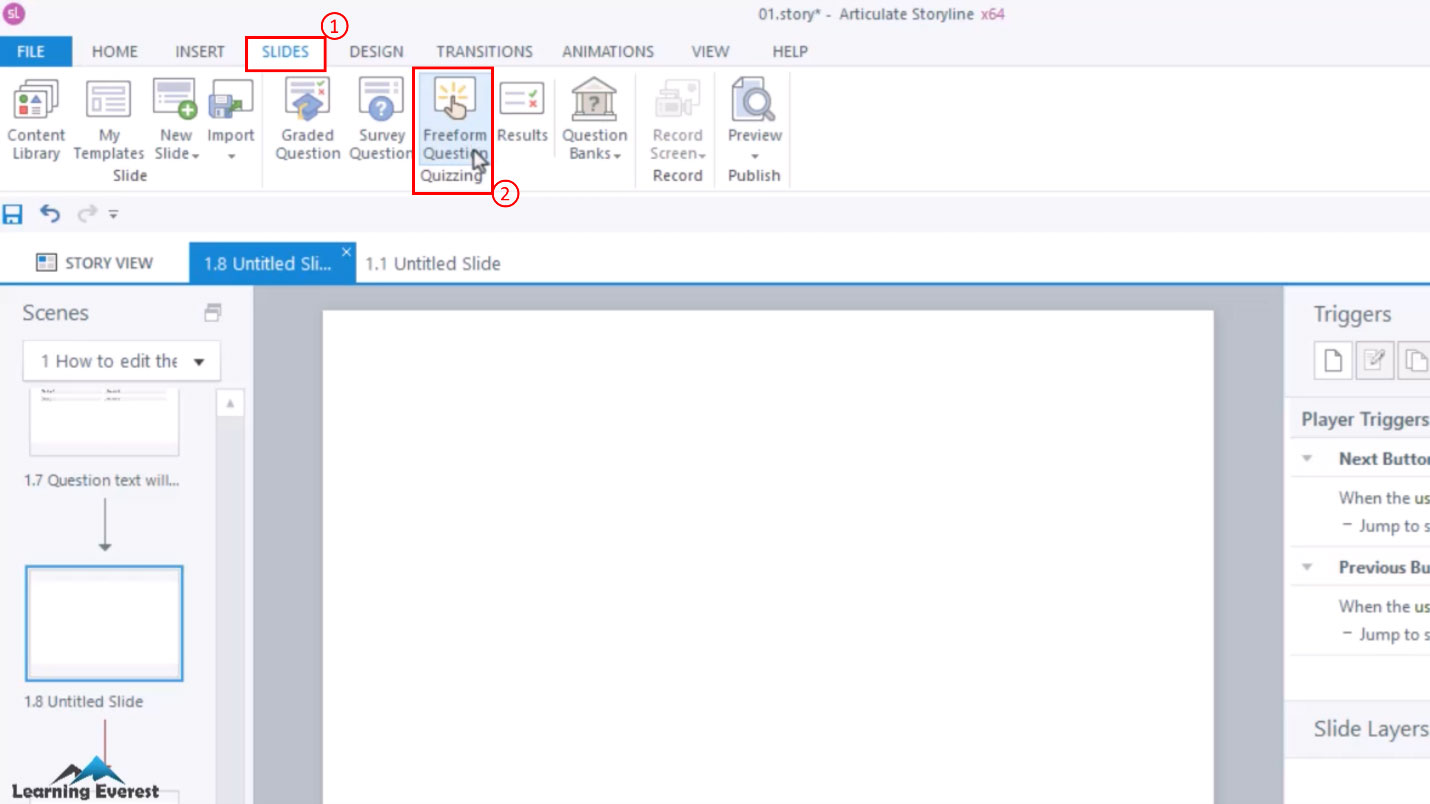
Steps to Create a Custom Quiz in Articulate Storyline 360- Accessing the quiz
Step 2: Selecting a question type
A menu with multiple question types will appear on the screen. Choose any of the question types, for example, choose the “Pick one” question type. Click “Insert” to proceed.
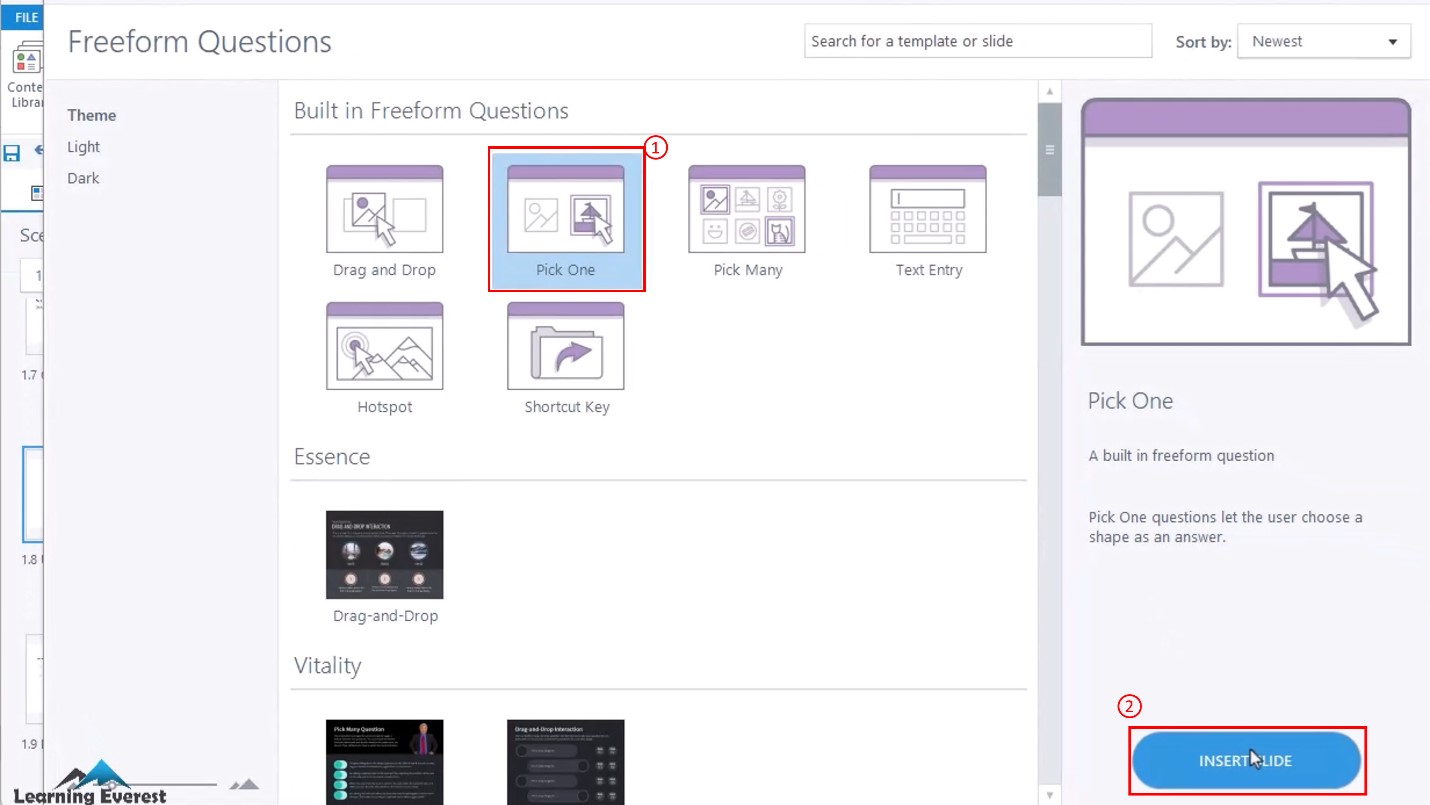
Steps to Create a Custom Quiz in Articulate Storyline 360- Selecting a question type
Step 3: Adding a question
Switch to the form view by using the panel on the right side. Here, you can define correct and incorrect responses and customize feedback if necessary. To add a question, go to the “Insert” tab, select “Text Box,” and draw a textbox on the screen. Type your question into the textbox.
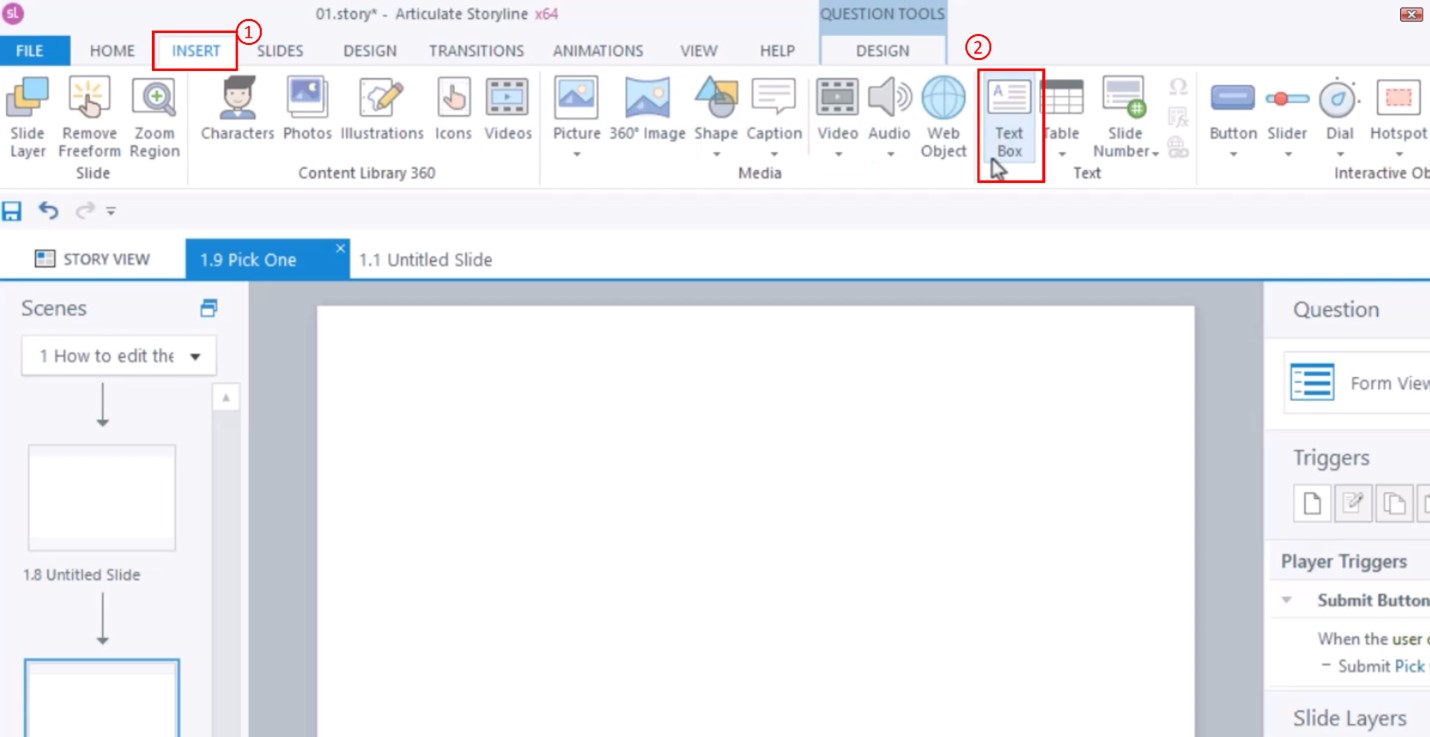
Steps to Create a Custom Quiz in Articulate Storyline 360- Adding a question
Step 4: Creating options
To create answer options, go back to the “Insert” tab, open the “Input” dropdown from the “Interactive Objects” section, and choose radio buttons. Insert them on the screen and provide the options next to the buttons.
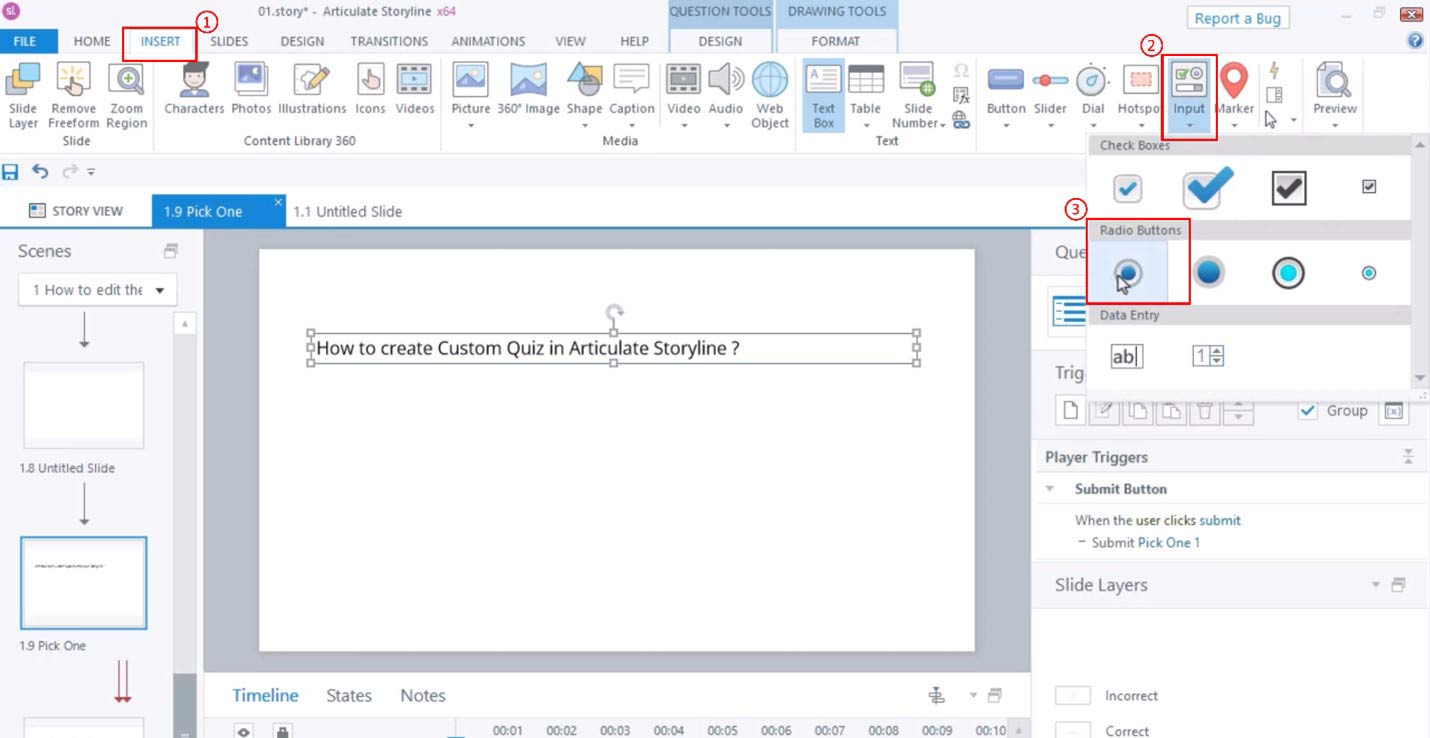
Steps to Create a Custom Quiz in Articulate Storyline 360- Creating options
Step 5: Setting correct and incorrect responses
Return to the form view and navigate to the “Enter the choices” section. Add the radio buttons as potential options and specify the correct response by selecting it in the “Correct” column.
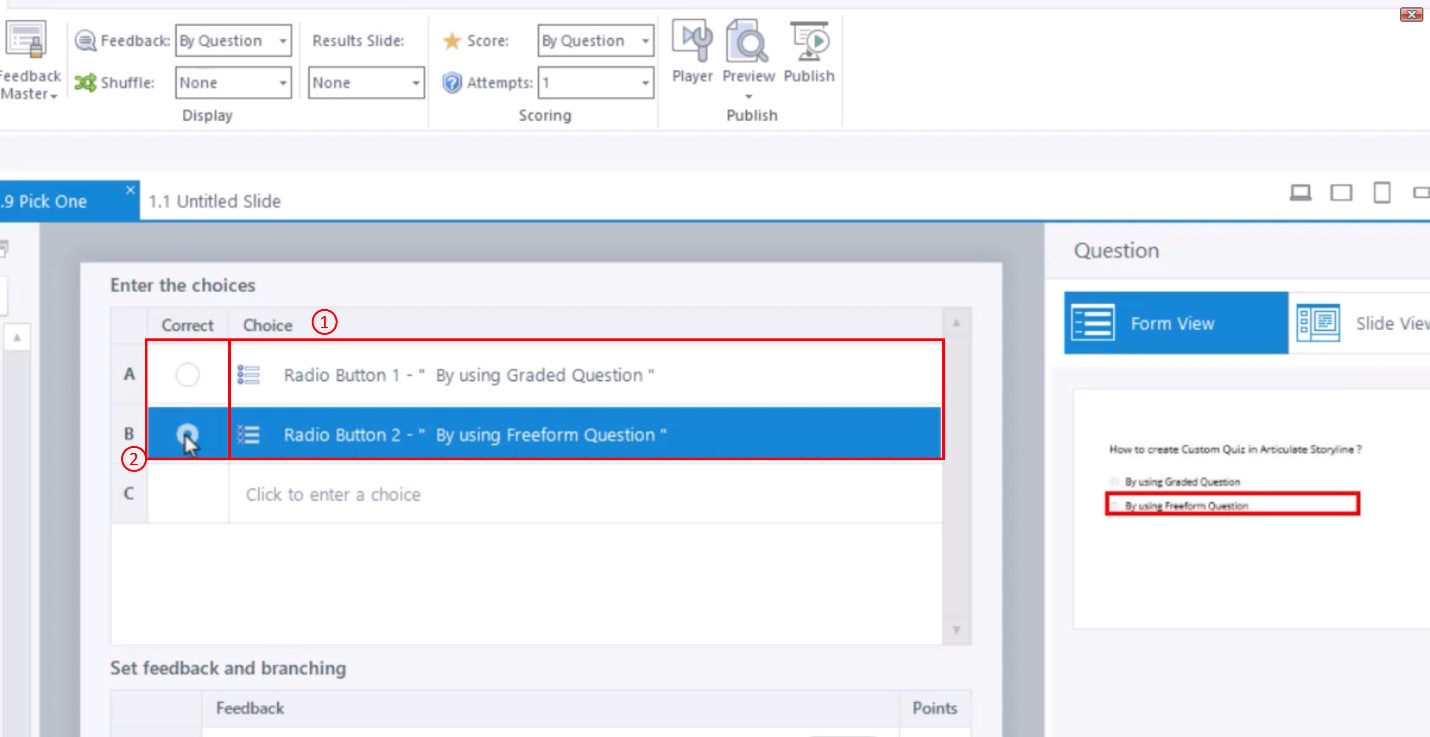
Steps to Create a Custom Quiz in Articulate Storyline 360- Setting correct and incorrect responses
Step 6: Adding a submit button
To customize the quiz further, you can add a custom submit button. Click the gear icon at the bottom right to open the Slide Properties tab. Uncheck “Submit” and click OK. Then, insert a button from the “Interactive Objects” section and label it as “Submit”.
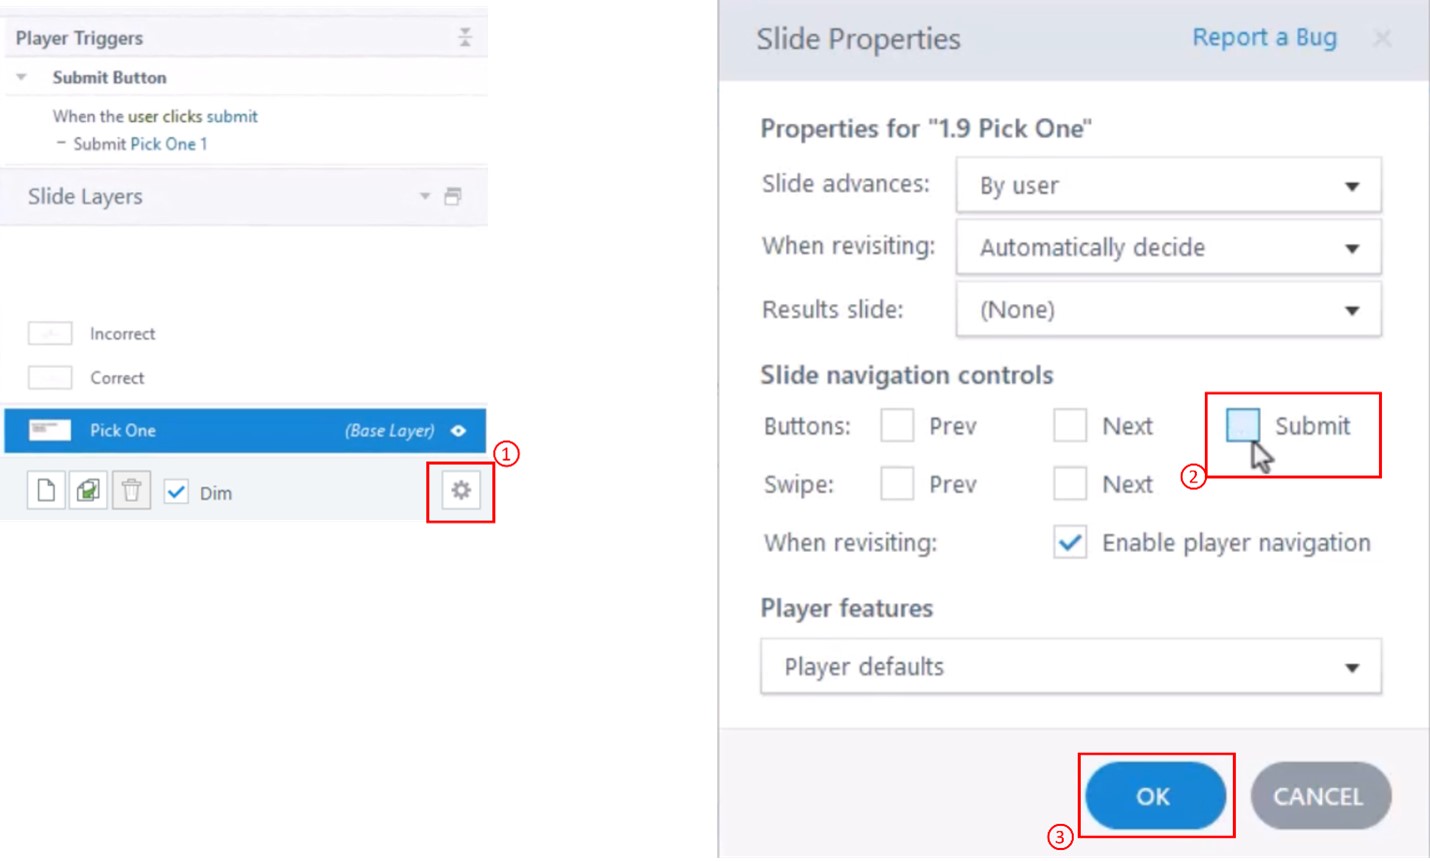
Steps to Create a Custom Quiz in Articulate Storyline 360- Adding a submit button
Step 7: Triggering the submit button
Make the submit button functional by adding a trigger. Switch to Slide View, select the button, and open the Trigger Wizard from the right panel. Configure the trigger to submit the interaction on the screen.
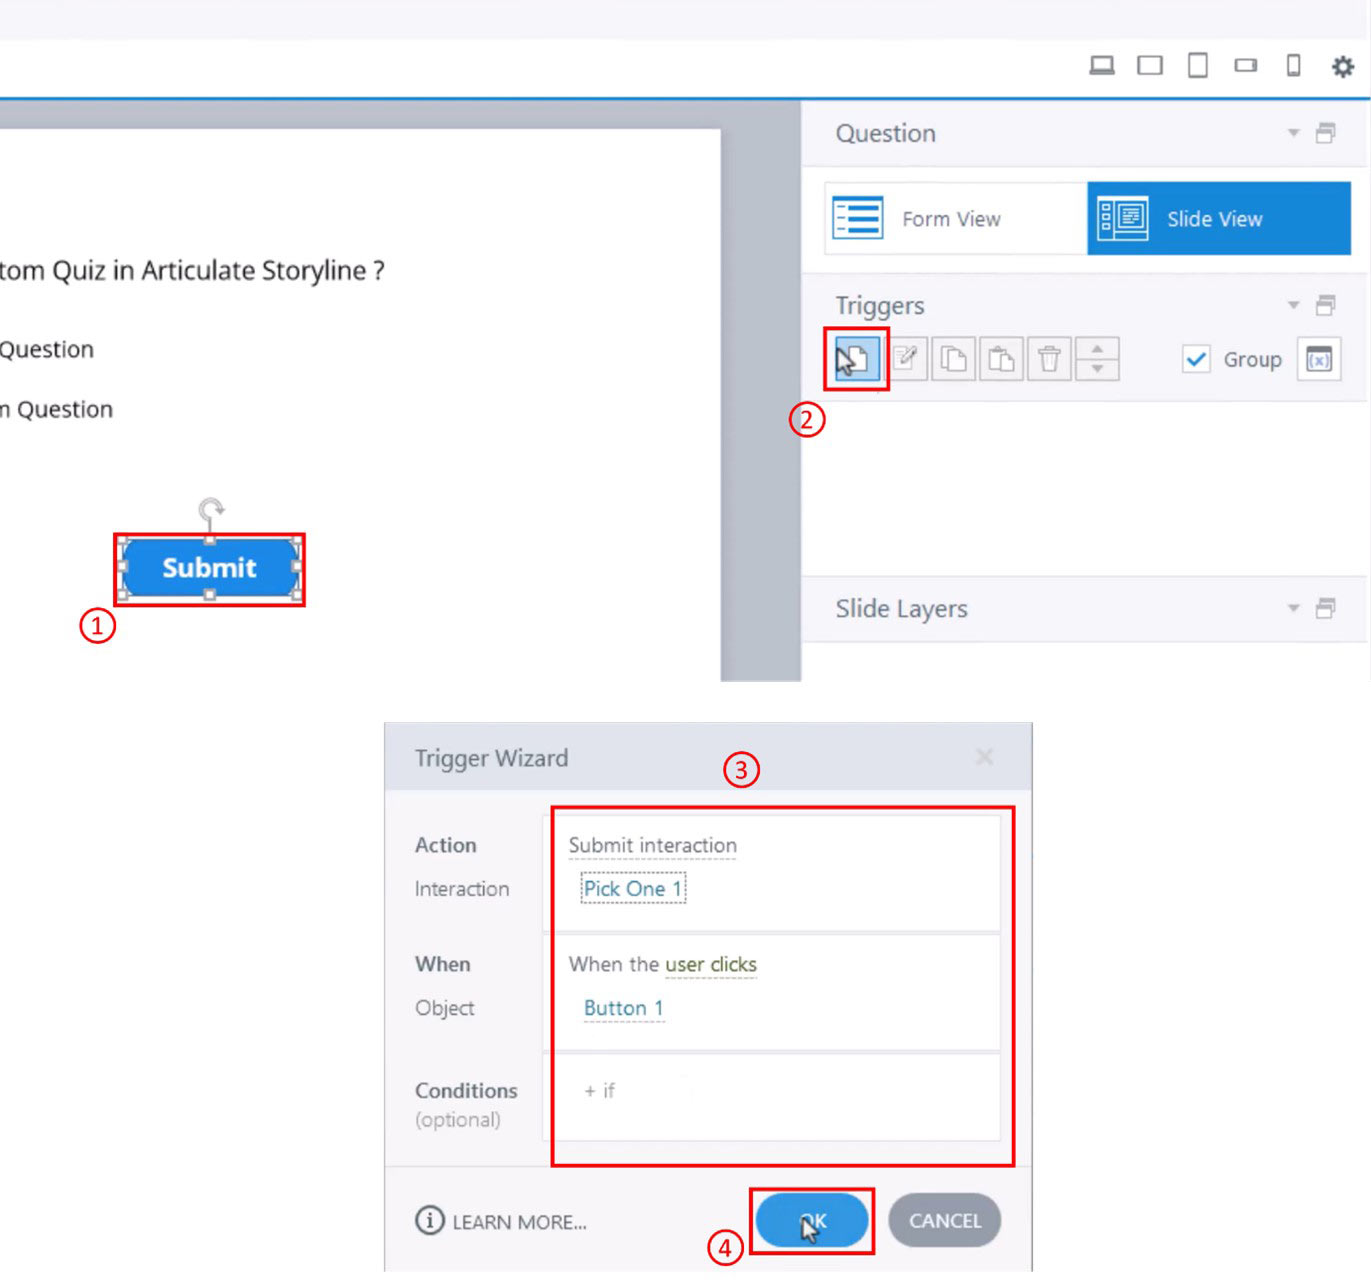
Steps to Create a Custom Quiz in Articulate Storyline 360- Triggering the submit button
Step 8: Previewing the quiz
To ensure your quiz works as expected, select the preview option from the top ribbon. This allows you to test your custom quiz before sharing it with your audience.
Conclusion
Congratulations! You’ve successfully created a custom quiz in Articulate Storyline. Stay tuned for more tutorials covering additional features and functionalities of this versatile e-learning authoring tool. Happy e-learning!
Knowledge Check!
Now, you are familiar with creating custom quiz activities in Articulate Storyline 360. There is a lot more you can do on Storyline, and we will cover more of its functionalities in the following tutorials. Stay tuned!
Frequently Asked Questions (FAQs)
1. How do you create a quiz on Articulate Storyline?
Go to the Home tab on the ribbon and click Graded Question. Select Multiple Choice and click Insert Question. Your new question will open in Form View, where you can enter question text and answer choices. Copy the question-and-answer text from the starter text.
2. How do you make a custom player in Storyline?
Access the Player Tab: Open your course in Storyline 360 and navigate to the “Home” tab. Click on the “Player” button to access the player settings. 2. Layout and Navigation: Customize the layout, navigation buttons, and progress indicators according to your design preferences.
3. How do I make my quiz more interactive?
Use images and multimedia: Using images, videos, and other multimedia elements can help to make the quiz more engaging and interactive for your audience. Make it fun.


