Interactive e-learning experiences can significantly enhance learner engagement and comprehension. One powerful tool in Articulate Storyline to guide you through the process of creating a dynamic matching drag-and-drop activity. Whether you're an instructional designer, educator, or someone looking to enhance your e-learning content, this step-by-step guide will empower you to captivate your audience with interactive and engaging exercises.
Table of Contents
Here Are 6 Steps for Creating a Matching Drag and Drop Activity in Articulate Storyline 360
Step 1: Navigating to the Graded Questions Option
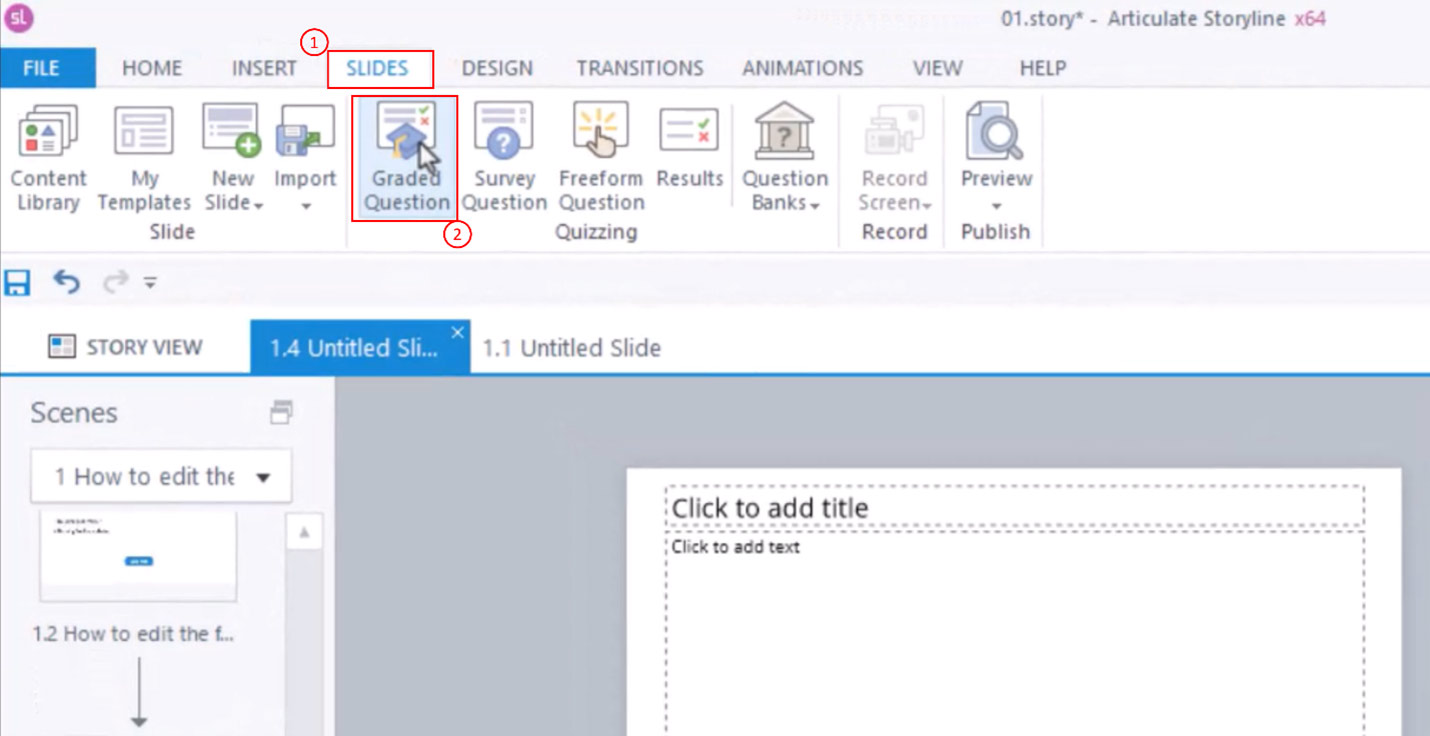
Your journey begins with the default view of the Articulate Storyline. To add a matching drag-and-drop activity, head to the “Slides” tab located in the top ribbon. Within this tab, explore the “Quizzing” section and select the “Graded questions” option. This action will unveil a template menu with various interactive options at your fingertips.

Navigating to the Graded Questions Option
Step 2: Choosing the Matching Drag-and-Drop Template
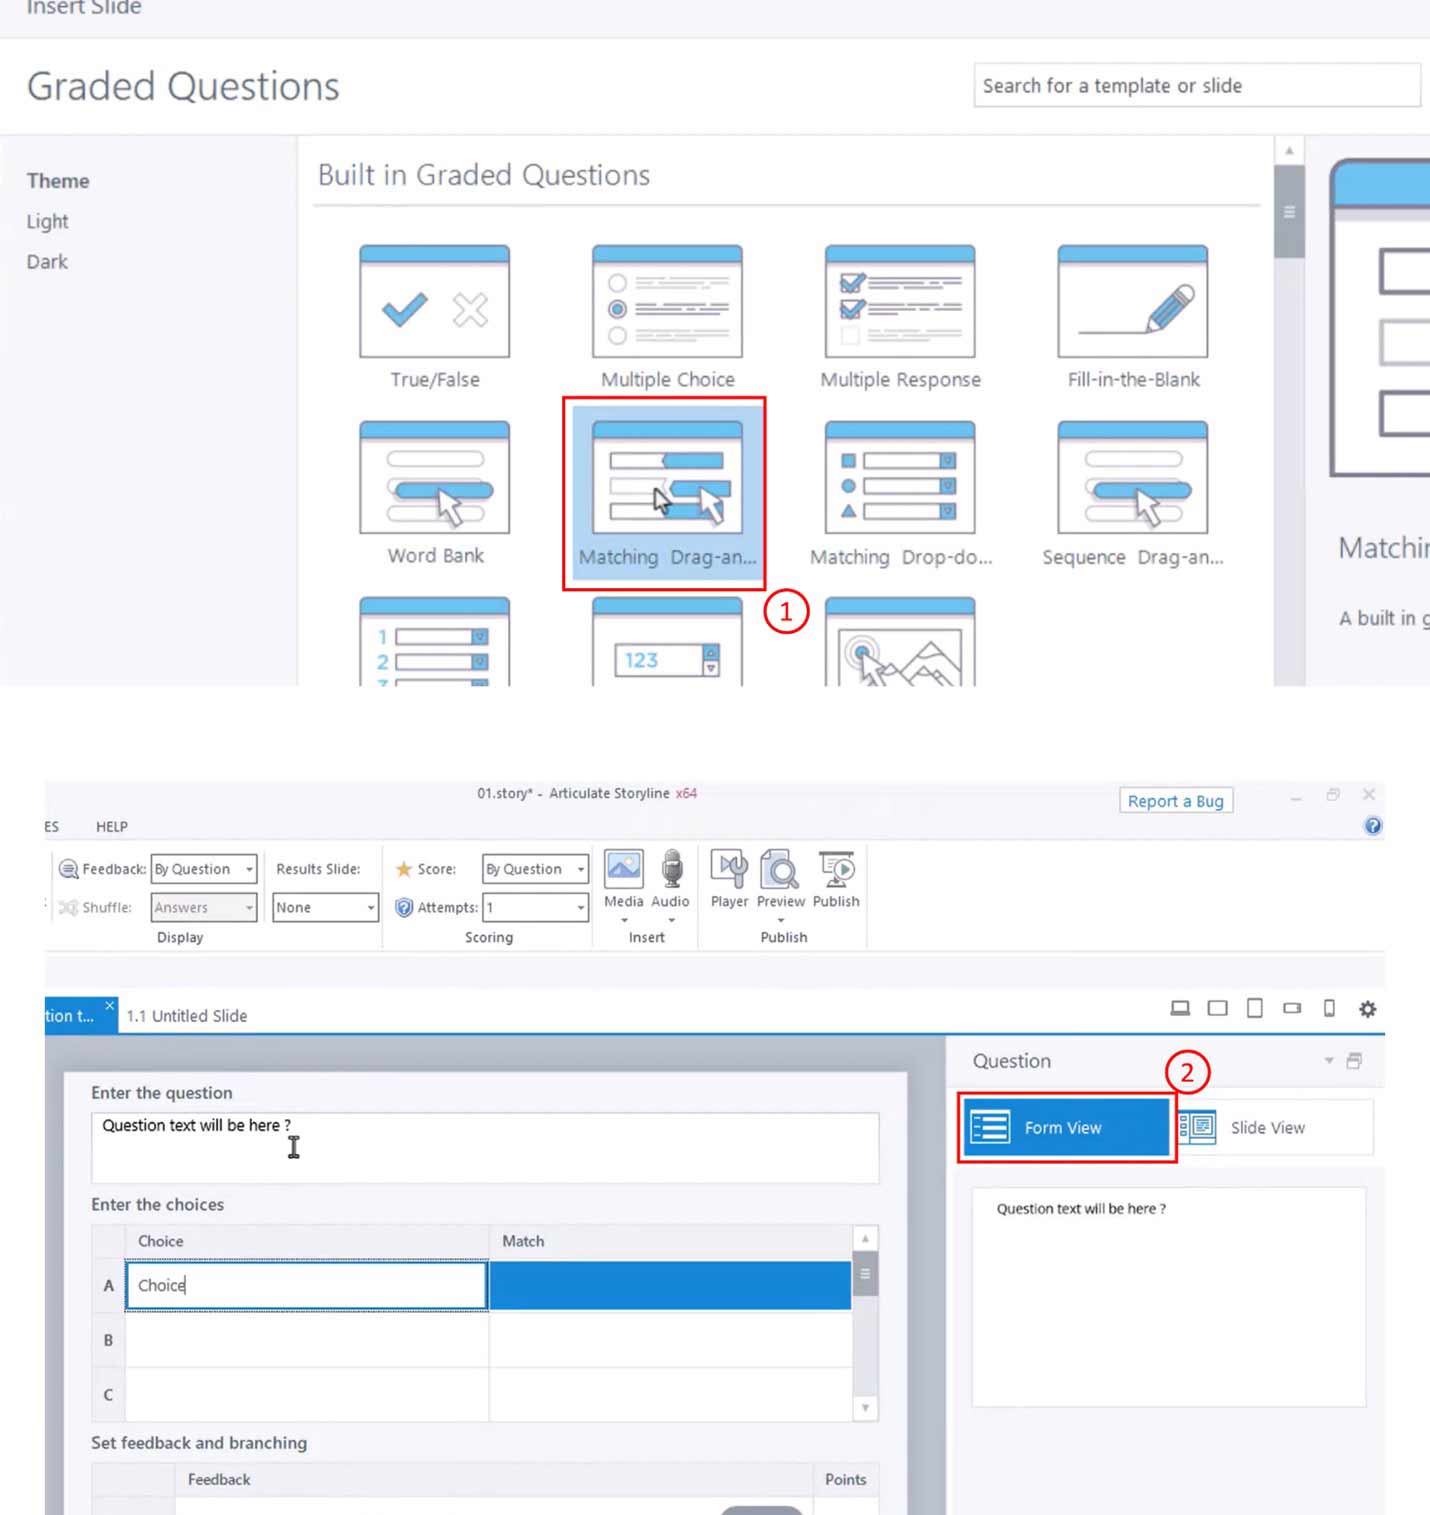
Among the array of templates, spot the intriguing “Matching drag-and-drop” question template. Click on it and seamlessly insert it into your project. Watch as your canvas transforms, presenting the matching drag-and-drop question in its initial “Form View.”

Choosing the Matching Drag-and-Drop Template
Step 3: Crafting a Compelling Question
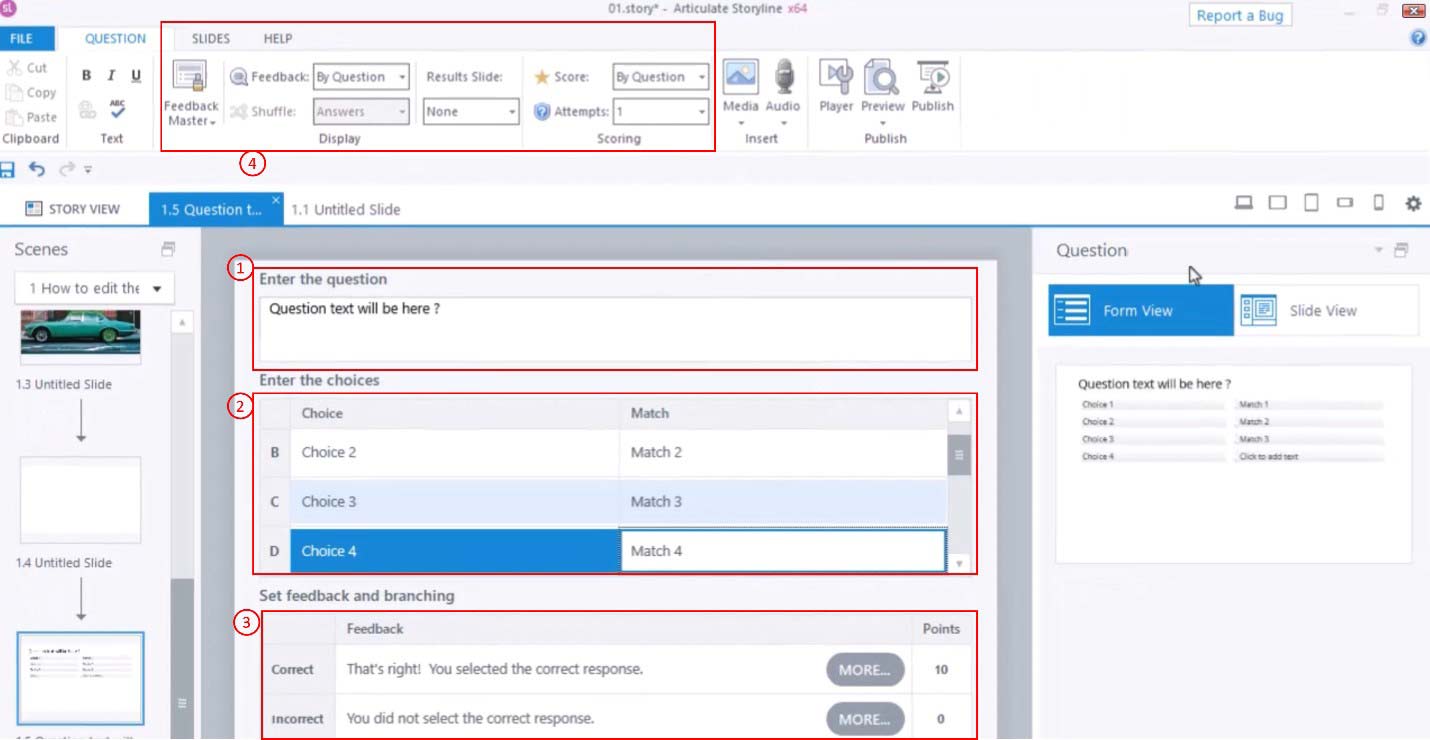
Now, let’s infuse life into your activity! Utilize the form view to fill in essential fields, including the question itself and the choices for the matching drag-and-drop exercise. Elevate your content by adding feedback for different learner responses, enhancing the overall learning experience.

Crafting a Compelling Question
Step 4: Configuring the Activity
Explore the top ribbon, where a plethora of options awaits. While shuffling answers isn’t possible in a matching drag-and-drop, remember that they will automatically shuffle in both preview and live versions. Tailor the activity to your preferences, adjusting parameters such as attempts based on your desired level of learner interaction.
Step 5: Previewing Your Creation
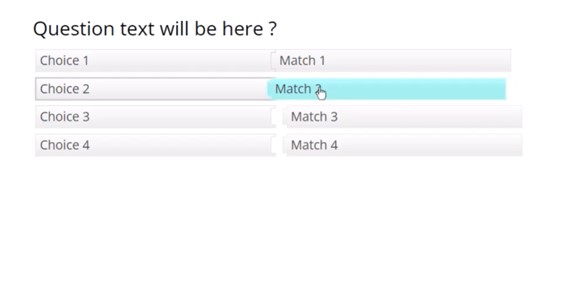
Before presenting your masterpiece, take a moment to preview the activity. Observe how the column containing options for learners to match dynamically shuffles, adding an element of unpredictability to the learning experience.

Previewing Your Creation
Step 6: Finalizing and Sharing
With your matching drag-and-drop activity polished, you’re ready to share it with your audience. Export your project or seamlessly integrate it into your existing e-learning course. Your learners are bound to appreciate the interactive and engaging learning experience you’ve crafted for them.
Conclusion
Congratulations! You’ve successfully learned how to create a matching drag-and-drop activity in Articulate Storyline. Armed with this knowledge, you have the tools to elevate your e-learning courses and captivate your audience. Now, it’s your turn to dive in and create your own matching drag-and-drop exercise. The possibilities are endless, and we look forward to seeing the interactive wonders you bring to life in Articulate Storyline. Stay tuned for more insightful tutorials and tips on transforming your e-learning content. Happy designing!
Knowledge Check!
Now, you are familiar with the Matching Drag and Drop Activity in Articulate Storyline 360. There is a lot more you can do on Storyline, and we will cover more of its functionalities in the following tutorials. Stay tuned!
Frequently Asked Questions (FAQs)
1. How do I enable drag and drop functionality?
Enable dropping by setting the Allow Drop property to true on all the elements that can receive dropped content.
2. What is a slider in the storyline?
Sliders are an interactive element you can add to your Articulate Storyline projects, and you’ll find that e-learning pros use them for all sorts of things, including Illustrating cause-and-effect relationships, like in this safe lifting example.
3. How do you create a slider interaction in the storyline?
Go to the Insert tab on the ribbon, click Slider, choose a slider type, and click the slide where you want the slider to appear. Tip: By default, sliders are horizontal, but you can make them vertical if you’d like. Just rotate them 90 degrees.


